Vue-组件二次封装
本次对
el-input进行简单封装进行演示
- 封装很简单,就给激活样式的边框(主要是功能)
本次封装主要使用到vue自带的几个对象
- $attrs:获取绑定在组件上的所有属性
- $listeners: 获取绑定在组件上的所有函数方法
- $slots: 获取应用在组件内的所有插槽
1、属性传递
element 的input组件有很多属性,
- 想要实现在封装好后的组件上使用
el-input组件的属性,会直接传递到el-input组件上,包括v-model。- 在组件中,可以使用
this.$attrs获取所有绑定在组件上的属性(不包括方法)- 这样,我们就可以在封装的组件内,使用
v-bind="$attrs",直接把属性传递到内部组件上。- 在下列案例中,由于
v-model是:value 和 @input两个组合的语法糖,$attrs只能获取属性,所以只能传递:value属性
1.1、父组件
<template>
  <div class="wrapper">
    <my-input v-model="val">
    </my-input>
  </div>
</template>

<script>
  import MyInput from '@/components/MyInput'
  export default {
    components: {
      MyInput,
    },
    data() {
      return {
        val: '111',
      }
    },
    methods: {
      inputChange(val){
        console.log(val);
      }
    }
  }
</script>

<style lang="scss" scoped>
  .wrapper {
    padding: 10vh;
  }
</style>
1.2、子组件
<template>
  <el-input v-bind="$attrs"></el-input>
</template>
<script>
  export default {
    created() {
      console.log("attrs:",this.$attrs);
    }
  }
</script>
<style lang="scss" scoped>
::v-deep {
  .el-input__inner:focus {
    border-color: red;
}
}

</style>
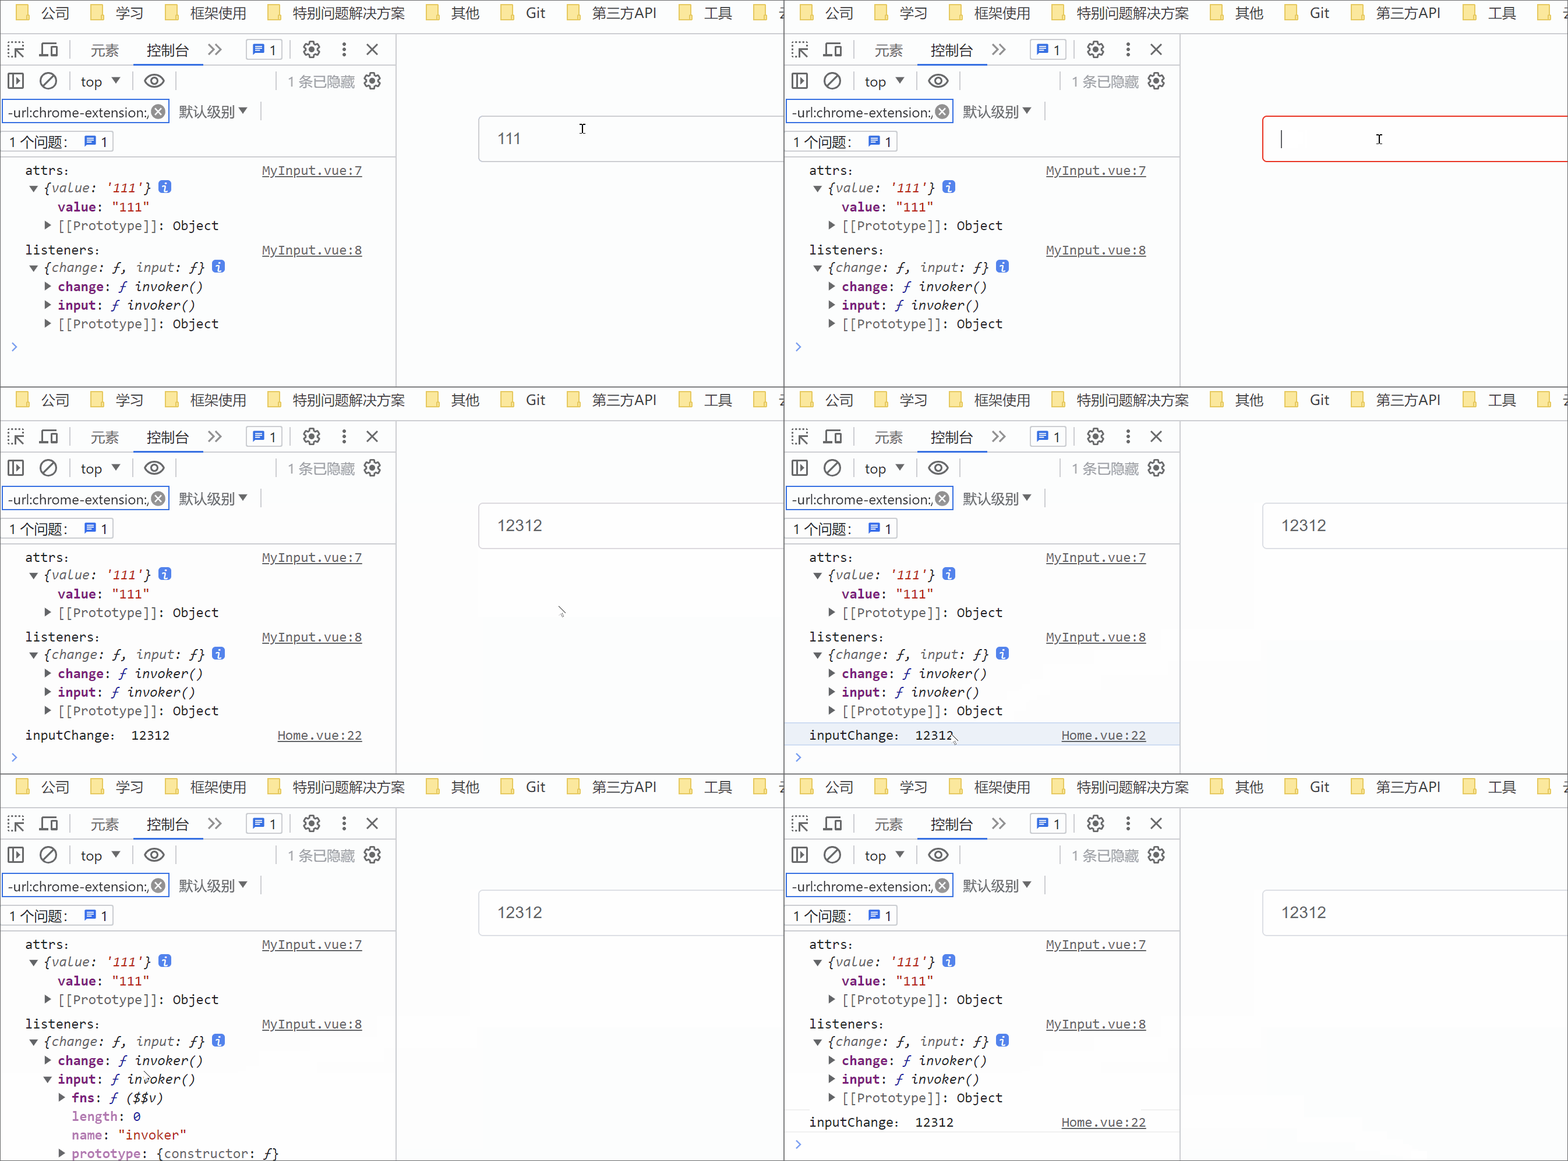
1.3、效果
- 这时候给输入框输入值是无效的,因为目前只能把
value属性绑定到el-input上,并没有把input函数绑定上去,所以不能修改父组件传过来的value的值。

2、方法传递
element的组件,也有很多方法,比如:change等函数
- 想要实现在封装好后的组件上使用
el-input组件的方法,会直接传递到el-input组件上。- 在组件中,可以使用
this.$listeners获取所有绑定在组件上的属性(不包括属性)- 这样,我们就可以在封装的组件内,使用
v-on="$listeners",直接把方法传递到内部组件上。- 在下列案例中,由于
v-model是:value 和 @input两个组合的语法糖,$listeners只能获取属性,所以结合上面$attrsjiu可以完整的实现v-model的效果了
2.1、父组件
<template>
  <div class="wrapper">
    <my-input v-model="val" @change="inputChange">
    </my-input>
  </div>
</template>

<script>
  import MyInput from '@/components/MyInput'
  export default {
    components: {
      MyInput,
    },
    data() {
      return {
        val: '111',
      }
    },
    methods: {
      inputChange(val){
        console.log("inputChange:", val);
      }
    }
  }
</script>
2.2、子组件
<template>
  <el-input v-bind="$attrs" v-on="$listeners"></el-input>
</template>
<script>
  export default {
    created() {
      console.log("attrs:",this.$attrs);
      console.log("listeners:",this.$listeners);
    }
  }
</script>
<style lang="scss" scoped>
::v-deep {
  .el-input__inner:focus {
    border-color: red;
  }
}

</style>
2.3、效果
这时候搭配
$attrs就可以实现v-model的完整效果了,以及@change函数也会传递过去

3、插槽传递
element的组件,也包括了很多的插槽
- 想要给封装好后的组件,使用的插槽,传递到
el-input中- 在组件中,可以使用
this.$slots获取所有绑定在组件上的插槽- 这样,我们就可以在封装的组件内,使用
v-for="(val, key) in $slots",所有插槽,遍历放到组件中,当作组件的插槽- 注意插槽传参也要处理(我这里没处理)
3.1、父组件
<template>
  <div class="wrapper">
    <my-input v-model="val" @change="inputChange">
      <template slot="prepend">Http://</template>
      <el-button slot="append" icon="el-icon-search"></el-button>
    </my-input>
  </div>
</template>

<script>
  import MyInput from '@/components/MyInput'
  export default {
    components: {
      MyInput,
    },
    data() {
      return {
        val: '111',
      }
    },
    methods: {
      inputChange(val){
        console.log("inputChange:", val);
      }
    }
  }
</script>

<style lang="scss" scoped>
  .wrapper {
    padding: 10vh;
  }
</style>
3.2、子组件
<template>
  <el-input v-bind="$attrs" v-on="$listeners">
    <template v-for="(val, key) in $slots">
      <slot :name="key"></slot>
    </template>
  </el-input>
</template>
<script>
  export default {
    created() {
      console.log("attrs:",this.$attrs);
      console.log("listeners:",this.$listeners);
      console.log("slots",this.$slots);
    }
  }
</script>
<style lang="scss" scoped>
::v-deep {
  .el-input__inner:focus {
    border-color: red;
  }
}

</style>
3.3、效果

4、ref伪传递(适用于vue3)
- 为什么说伪传递呢,因为在vue中,根本就拿不到外层组件的
ref属性,所以只能另换思路- 你要用ref,无非就是想调用组件里面的函数。那我封装的组件里面,可以把被封装的组件的函数,直接提取出来,当作我封装组件的函数即可实现
- 适用于Vue3,vue2会卡死
4.1、父组件
<template>
  <div class="wrapper">
    <my-input ref="muInput" v-model="val" @change="inputChange">
      <template slot="prepend">Http://</template>
      <el-button slot="append" icon="el-icon-search"></el-button>
    </my-input>
  </div>
</template>

<script>
  import MyInput from '@/components/MyInput'
  export default {
    components: {
      MyInput,
    },
    data() {
      return {
        val: '111',
      }
    },
    mounted() {
      this.$refs.muInput.focus()
    },
    methods: {
      inputChange(val){
        console.log("inputChange:", val);
      }
    }
  }
</script>

<style lang="scss" scoped>
  .wrapper {
    padding: 10vh;
  }
</style>
4.2、子组件
<template>
  <el-input ref="input" v-bind="$attrs" v-on="$listeners">
    <template v-for="(val, key) in $slots" #[key]>
      <slot :name="key"></slot>
    </template>
  </el-input>
</template>
<script>
  export default {
    mounted() {
      console.log("attrs:",this.$attrs);
      console.log("listeners:",this.$listeners);
      console.log("slots",this.$slots);

      for (const [key, value] of Object.entries(this.$refs.input)) {
        this[key] = value
      }
    }
  }
</script>
<style lang="scss" scoped>
::v-deep {
  .el-input__inner:focus {
    border-color: red;
  }
}

</style>
5、插槽传递补充22
- $slots可以获取所有应用在子组件上的插槽。但是仅限于子组件不使用插槽进行传参(作用域插槽)只能捕获到具名插槽。
- 当需要使用作用域插槽时,就会发现,
$solts捕获不到这个插槽了。- 这时候,就需要使用
$scopedSlots,它就等于具名插槽 + 作用域插槽,捕获的更加全面。- 上面我们只是使用
$slots传递具名插槽,如果插槽需要传参,则无法使用,我们要换成更加全面的$scopedSlots
5.1、子组件
<template>
  <el-input v-bind="$attrs" v-on="$listeners">
    <template v-for="(val, key) in $scopedSlots" :scope="scope">
      <slot :name="key" :data="scope"></slot>
    </template>
  </el-input>
</template>
<script>
  export default {
    created() {
      console.log("attrs:",this.$attrs);
      console.log("listeners:",this.$listeners);
      console.log("slots",this.$slots);
      console.log("scopedSlots",this.$scopedSlots);
    }
  }
</script>
<style lang="scss" scoped>
::v-deep {
  .el-input__inner:focus {
    border-color: red;
  }
}

</style>