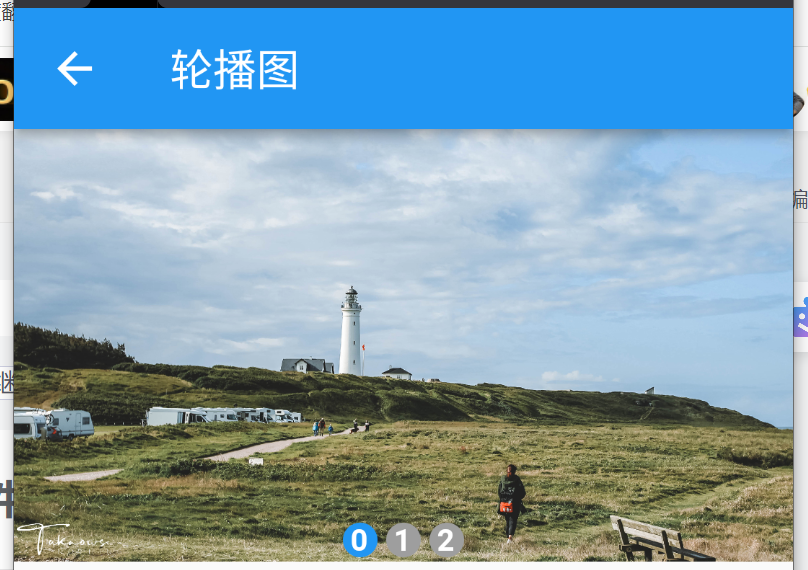
使用flutter开发一个简单的轮播图带指示器的组件

使用PageView开发一个带指示器的轮播图组件,当轮播图切换的时候,指示器也会跟着切换,切换到当前轮播图所在的索引时,指示器的背景色会变成蓝色,否则是灰色。使用了一个curIndex变量来记录当前激活的轮播图索引。并使用Stack组件来实现定位布局。
组件代码:
import 'package:flutter/material.dart';

// 轮播图
class Lunbo extends StatefulWidget {
  const Lunbo({super.key});

  @override
  State<Lunbo> createState() => _LunboState();
}

class _LunboState extends State<Lunbo> {
  // 定义轮播图列表
  List<Widget> imgList = [];

  // 记录一下当前图片的索引,激活指示器背景色
  var curIndex = 0;

  void handle = (int cur) {
    print("handle函数");
  };

  @override
  void initState() {
    // TODO: implement initState
    var imgUrls = [
      "https://img-blog.csdnimg.cn/img_convert/b723ea01d277dac4926a936f9b40862c.jpeg",
      "https://img-blog.csdnimg.cn/img_convert/d794e0b76460ea037fc707b01bb1d703.jpeg",
      "https://img-blog.csdnimg.cn/img_convert/f90cd009d24e58857a135cfcd44fe993.jpeg"
    ];
    // 图片列表初始化
    for (int i = 0; i < imgUrls.length; i++) {
      imgList.add(Image.network(
        imgUrls[i],
        fit: BoxFit.fill,
      ));
    }
    super.initState();
  }

  @override
  Widget build(BuildContext context) {
    return Scaffold(
        appBar: AppBar(title: const Text('轮播图')),
        body: Container(
          // width: double.infinity,
          height: 200,
          child: Stack(
            children: [
              PageView(
                scrollDirection: Axis.horizontal,
                // reverse: true,
                children: imgList,
                onPageChanged: (index) {
                  print("轮播图切换了: ${index}");
                  setState(() {
                    curIndex = index;
                  });
                },
              ),
              Positioned(
                  left: 0,
                  right: 0,
                  bottom: 2,
                  child: Row(
                    mainAxisAlignment: MainAxisAlignment.center,
                    children: List.generate(3, (index) {
                      return Container(
                        width: 20,
                        alignment: Alignment.center,
                        decoration: BoxDecoration(
                            shape: BoxShape.circle,
                            color:
                                curIndex == index ? Colors.blue : Colors.grey),
                        child: Text(
                          "$index",
                          style: TextStyle(
                              color: Colors.white, fontWeight: FontWeight.bold),
                        ),
                      );
                    }).toList(),
                  ))
            ],
          ),
        ));
  }
}