16-k8s-configMap配置管理中心
一、相关概念
-
简介
为了解决传统容器中配置的挂载、变更、管理等问题,在k8s中引入了一个叫做configmap的资源对象,在configmap中,各个配置项都是以key-value的方式存在的,value的数据可以是一个配置文件的内容,这些配置项被保存在k8s使用的持久化存储etcd中。这样就形成了一个k8s中的配置中心,可以独立的对configmap中的数据进行修改,然后将configmap挂载到pod中进行使用,可以以env的方式,也可以以配置文件的方式在pod中进行引用。这样配置和pod就实现了解耦,都是k8s中独立的资源对象。
-
使用场景
• 填充环境变量的值
• 设置容器内的命令行参数
• 填充卷的配置文件 -
常用创建方式
• 基于目录创建
• 基于文件创建
• 基于自定义参数创建 -
configMap指令查看:kubectl create configMap -h
二、基于目录创建configMap
-
创建文件夹:mkdir /opt/config
-
创建文件:vi /opt/config/t1.properties
configmap1: name: myConfigmap1 -
创建文件:vi /opt/config/t2.properties
configmap2: name: myConfigmap2 -
创建configMap:kubectl create configmap my-config --from-file=/opt/config/
-
查看:kubectl get cm

-
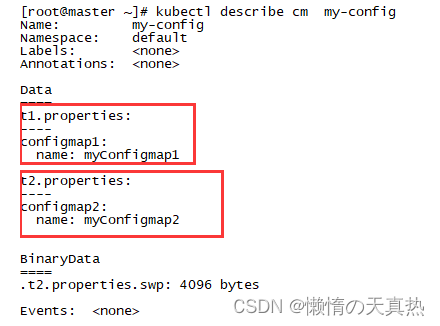
查看详情:kubectl describe cm my-config
三、基于文件创建configMap
-
创建configMap:kubectl create configmap t1-config --from-file=/opt/config/t1.properties
-
查看:kubectl get cm

-
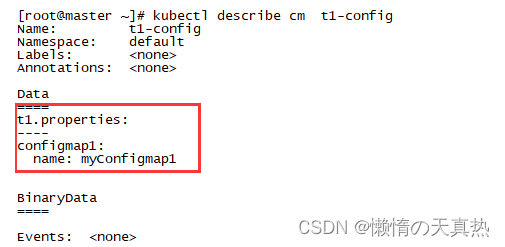
查看详情kubectl describe cm t1-config
-
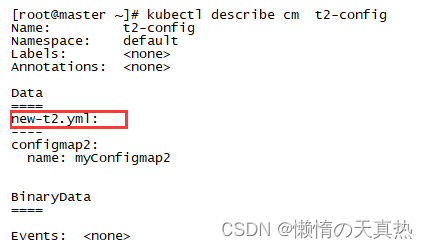
基于文件创建configMap并且修改文件名:kubectl create cm t2-config --from-file=new-t2.yml=/opt/config/t2.properties
-
查看:kubectl describe cm t2-config
四、基于自定义参数创建configMap
-
创建:kubectl create cm t3-config --from-literal=username=root --from-literal=password=admin
-
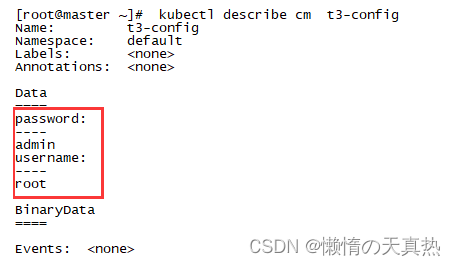
查看详情(这种方式创建不会有文件名): kubectl describe cm t3-config
五、configMap使用
-
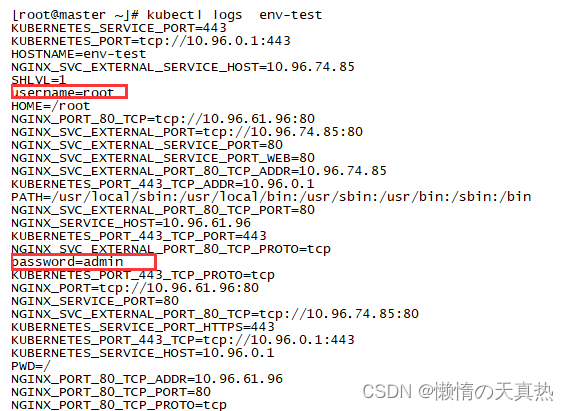
创建一个pod,将configMap参数设置为环境变量并且打印出来
1)vi /opt/env-test.yaml
apiVersion: v1
kind: Pod
metadata:
  name: env-test
spec:
  containers:
  - name: env-test
    image: alpine
    command: ["/bin/sh", "-c", "env;sleep 3600"]
    imagePullPolicy: IfNotPresent
    env :
    - name: username
      valueFrom:
        configMapKeyRef:
          name: t3-config # configMap的名字
          key: username #表示从name的ConfigMap中获取名字为key 的 value,将其赋值给本地环境变量JAVA_YM_OPTS
    - name: password
      valueFrom:
        configMapKeyRef:
          name: t3-config
          key: password
  restartPolicy: Never
2)创建pod:kubectl apply -f /opt/env-test.yaml
3)查看:kubectl logs env-test
-
创建一个pod,将configMap参数挂载到pod里面去
1)创建ytaml文件:vi /opt/env-test-pod.yaml
ps:该方式将会把需要挂载的目录底下的文件都清除掉,被挂载文件夹的文件替换掉
apiVersion: v1
kind: Pod
metadata:
  name: env-test-pod
spec:
  containers:
  - name: env-test
    image: alpine
    command: ["/bin/sh", "-c", "env;sleep 3600"]
    imagePullPolicy: IfNotPresent
    volumeMounts: #加载数据卷
    - name: t1-config #表示加载volumes属性中哪个数据卷
      mountPath: "/usr/local/mysql/conf" #想要将数据卷中的文件加载到哪个目录下
      readOnly: true #是否只读
  volumes: #数据卷挂载configmap. secret
    - name: t1-config  #数据卷的名字,随意设置
      configMap: #数据卷类型为CofngiMap
        name: t1-config  # configMap 的名字,必须跟想要加载的 configmap 相同
        items: #对configmap 中的 key进行映射,如果不指定,默认会讲configmap中所有 key全部转换为一个个同名的文件
        - key : "t1.properties" # configMap中的key
          path: "t1.properties" #将该 key的值转换为文件
  restartPolicy : Never
2)创建pod:kubectl apply -f /opt/env-test-pod.yaml
3)进入pod并且检查文件
kubectl exec -it env-test-pod -- sh
cd /usr/local/mysql/conf
ls

-
我们可以使用subPath属性避免上面那种完全覆盖文件夹的情况
1)编辑文件夹:vi /opt/env-subPath-pod.yaml
apiVersion: v1
kind: Pod
metadata:
  name: env-subpath-pod
spec:
  containers:
  - name: testc
    image: busybox
    command: ["/bin/sleep","10000"]
    volumeMounts:
      - name: t1-config
        mountPath: /etc/config.ini   # 最终在容器中的文件名
        subPath: config.ini  #要挂载的confmap中的key的名称
  volumes:
    - name: t1-config
      configMap:
        name: t1-config
        items: #对configmap 中的 key进行映射,如果不指定,默认会讲configmap中所有 key全部转换为一个个同名的文件
        - key : "t1.properties" # configMap中的key
          path: "config.ini" #将该key的值转换为文件
2)创建pod:kubectl apply -f /opt/env-subPath-pod.yaml
3)验证
kubectl exec -it env-subpath-pod  -- sh
cd /etc
ls

六、configMap热更新
-
热更新情况
1) 默认方式(挂载configmap):会更新,更新周期是更新时间+缓存时间 2) subPath:不会更新 3) 变量形式:如果pod 中的一个变量是从 configmap或 secret中得到,同样也是不会更新的 对于subPath 的方式,我们可以取消subPath 的使用,将配置文件挂载到一个不存在的目录,避免目录的要盖,然后再利用软连接的形式,将该文件牯持到目标位置 -
前面我们是以env-test-pod节点为默认方式启动的节点,所以直接拿env-test-pod节点测试
-
验证热更新
1)查看节点内容
kubectl exec -it env-test-pod -- sh
cd /usr/local/mysql/conf
ls

2)修改: kubectl edit cm t1-config
加上热更新三个字
data:
  t1.properties: "configmap1: \n  name: myConfigmap热更新\n"
3)需要稍等一会,然后重新访问:cat t1.properties

-
修改configMap文件的方式
ps:除了直接修改kubectl edit cm以外,也可以使用replace
1)修改配置文件:vi /opt/config/t1.properties
configmap2:
  name: myConfigmap2热更新replace
2)刷新:kubectl create configmap t1-config --from-file=/opt/config/t1.properties --dry-run -o yaml | kubectl replace -f-
3)需要稍等一会,然后重新访问:cat t1.properties

-
对于一些敏感服务的配置文件,在线上有时是不允许修改的,此时在配置configmap时可以设置禁止修改:kubectl edit cm t1-config
增加:immutable: true
# Please edit the object below. Lines beginning with a '#' will be ignored,
# and an empty file will abort the edit. If an error occurs while saving this file will be
# reopened with the relevant failures.
#
apiVersion: v1
data:
  t1.properties: "configmap1: \n  name: myConfigmap1热更新replace\n"
immutable: true
kind: ConfigMap
metadata:
  creationTimestamp: "2023-07-21T14:32:47Z"
  name: t1-config
  namespace: default
  resourceVersion: "195897"
  uid: 683b2f51-a539-4486-8ee6-bf0b0a6eab11