ceph集群搭建
一、环境准备
1.1、服务器准备
| 操作系统 | 服务器IP | 服务器规格 |
| centos7.6 | 192.168.161.11 | 4C/8G |
| centos7.6 | 192.168.161.12 | 4C/8G |
| centos7.6 | 192.168.161.13 | 4C/8G |
1.2、服务器环境准备
1.2.1 更改主机名并添加映射
更改主机名
[root@localhost ~]# hostnamectl set-hostname ceph01 ##或者临时更改hostname ceph01
[root@localhost ~]# su
添加映射关系
[root@ceph01 ~]# vim /etc/hosts
192.168.161.11 ceph01
192.168.161.12 ceph02
192.168.161.13 ceph03
1.2.2 更改,关闭防火墙规则,并且制作免密登录
关闭增强
[root@ceph01 ~]# vim /etc/sysconfig/selinux ##永久关闭
SELINUX=disabled
[root@ceph01 ~]# setenforce 0 ##临时关闭
关闭防火墙
[root@ceph01 ~]# systemctl disable firewalld --now
Removed symlink /etc/systemd/system/multi-user.target.wants/firewalld.service.
Removed symlink /etc/systemd/system/dbus-org.fedoraproject.FirewallD1.service.
[root@ceph01 ~]# systemctl status firewalld
● firewalld.service - firewalld - dynamic firewall daemon
Loaded: loaded (/usr/lib/systemd/system/firewalld.service; disabled; vendor preset: enabled)
Active: inactive (dead)
Docs: man:firewalld(1)
12月 28 20:58:06 localhost.localdomain systemd[1]: Starting firewalld - dynamic firewall daemon...
12月 28 20:58:08 localhost.localdomain systemd[1]: Started firewalld - dynamic firewall daemon.
12月 28 21:51:33 ceph01 systemd[1]: Stopping firewalld - dynamic firewall daemon...
12月 28 21:51:34 ceph01 systemd[1]: Stopped firewalld - dynamic firewall daemon.
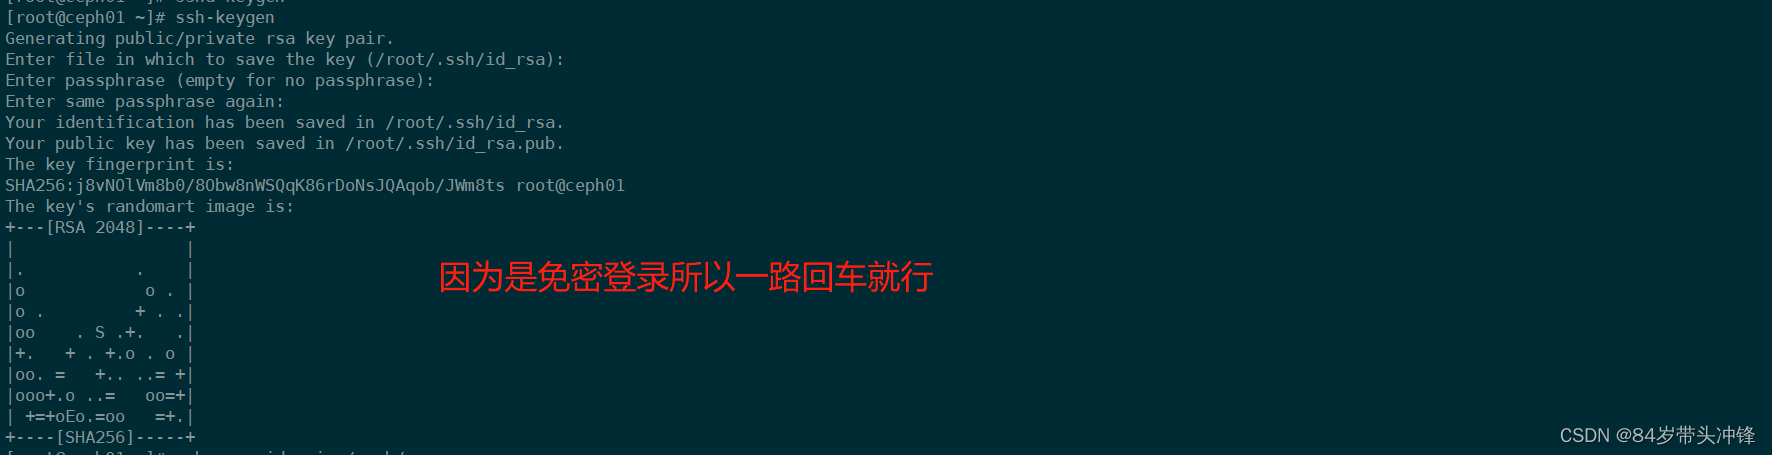
制作密钥
[root@ceph01 ~]# ssh-keygen
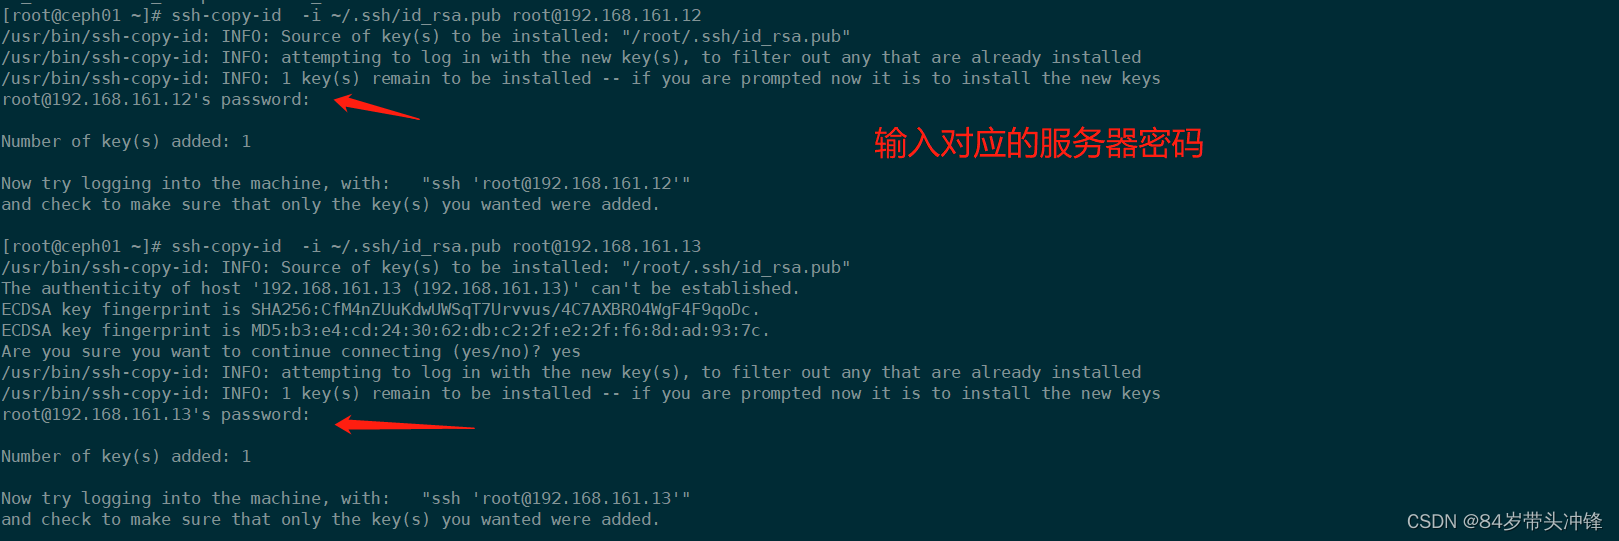
将密钥上传至其他服务器
[root@ceph01 ~]# ssh-copy-id -i ~/.ssh/id_rsa.pub root@192.168.161.13
[root@ceph01 ~]# ssh-copy-id -i ~/.ssh/id_rsa.pub root@192.168.161.12
1.2.3 设置时钟同步
[root@ceph01 ~]# yum install -y ntp

[root@ceph01 ~]# vim /etc/ntp.conf
restrict 192.168.161.0 mask 255.255.255.0 nomodify notrap #时钟服务器修改

[root@ceph02 ~]# vim /etc/ntp.conf   客户端修改
server 192.168.161.11 #上游同步服务器
restrict 192.168.161.11  nomodify notrap noquery # 允许上游服务器更改本机时间

[root@ceph01 ~]# systemctl restart ntpd  启动服务

[root@ceph02 ~]# ntpq  -p  查看状态
     remote           refid      st t when poll reach   delay   offset  jitter
==============================================================================
 ceph01          108.59.2.24      3 u   25   64    3    0.239   -4.649   0.901
二、服务安装
2.1 搭建ceph的yum源
[root@ceph01 ~]# vim /etc/yum.repos.d/ceph.repo  ##三台服务器同步进行

[ceph]

name=ceph

baseurl=http://mirrors.aliyun.com/ceph/rpm-mimic/el7/x86_64/

enabled=1

gpgcheck=0

priority=1

[ceph-noarch]

name=cephnoarch

baseurl=http://mirrors.aliyun.com/ceph/rpm-mimic/el7/noarch/

enabled=1

gpgcheck=0

priority=1

[ceph-source]

name=Ceph source packages

baseurl=http://mirrors.aliyun.com/ceph/rpm-mimic/el7/SRPMS

enabled=1

gpgcheck=0

priority=1

更新yum源
[root@ceph01 yum.repos.d]# yum makecache && yum clean all
[root@ceph01 yum.repos.d]# yum update -y
2.2 ceph搭建
2.2.1 安装工具
在node1上安装部署工具(其他节点不用安装)
安装部署工具
[root@ceph01 ~]# yum install -y ceph-deploy

建立集群配置目录  注:后面大部分操作在此目录进行

[root@ceph01 ~]# mkdir -p /etc/ceph

[root@ceph01 ~]# cd /etc/ceph
2.2.2 创建集群
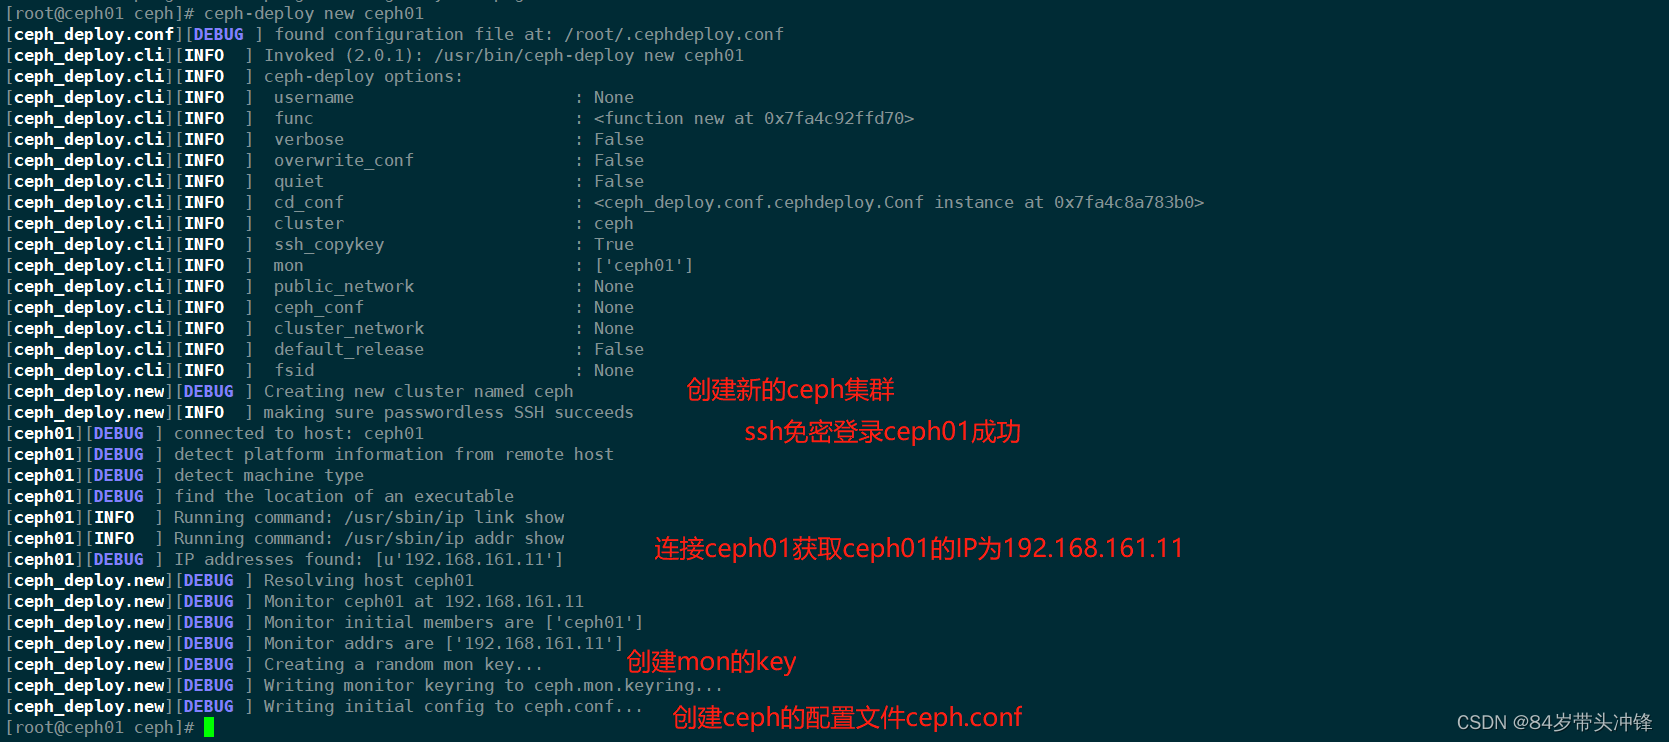
[root@ceph01 ceph]# ceph-deploy new ceph01
Traceback (most recent call last):
  File "/usr/bin/ceph-deploy", line 18, in <module>
    from ceph_deploy.cli import main
  File "/usr/lib/python2.7/site-packages/ceph_deploy/cli.py", line 1, in <module>
    import pkg_resources
ImportError: No module named pkg_resources
[root@ceph01 ceph]# yum install python-setuptools -y
[root@ceph01 ceph]# ceph-deploy new ceph01
[ceph_deploy.conf][DEBUG ] found configuration file at: /root/.cephdeploy.conf
[ceph_deploy.cli][INFO  ] Invoked (2.0.1): /usr/bin/ceph-deploy new ceph01
[ceph_deploy.cli][INFO  ] ceph-deploy options:
[ceph_deploy.cli][INFO  ]  username                      : None
[ceph_deploy.cli][INFO  ]  func                          : <function new at 0x7fa4c92ffd70>
[ceph_deploy.cli][INFO  ]  verbose                       : False
[ceph_deploy.cli][INFO  ]  overwrite_conf                : False
[ceph_deploy.cli][INFO  ]  quiet                         : False
[ceph_deploy.cli][INFO  ]  cd_conf                       : <ceph_deploy.conf.cephdeploy.Conf instance at 0x7fa4c8a783b0>
[ceph_deploy.cli][INFO  ]  cluster                       : ceph
[ceph_deploy.cli][INFO  ]  ssh_copykey                   : True
[ceph_deploy.cli][INFO  ]  mon                           : ['ceph01']
[ceph_deploy.cli][INFO  ]  public_network                : None
[ceph_deploy.cli][INFO  ]  ceph_conf                     : None
[ceph_deploy.cli][INFO  ]  cluster_network               : None
[ceph_deploy.cli][INFO  ]  default_release               : False
[ceph_deploy.cli][INFO  ]  fsid                          : None
[ceph_deploy.new][DEBUG ] Creating new cluster named ceph
[ceph_deploy.new][INFO  ] making sure passwordless SSH succeeds
[ceph01][DEBUG ] connected to host: ceph01
[ceph01][DEBUG ] detect platform information from remote host
[ceph01][DEBUG ] detect machine type
[ceph01][DEBUG ] find the location of an executable
[ceph01][INFO  ] Running command: /usr/sbin/ip link show
[ceph01][INFO  ] Running command: /usr/sbin/ip addr show
[ceph01][DEBUG ] IP addresses found: [u'192.168.161.11']
[ceph_deploy.new][DEBUG ] Resolving host ceph01
[ceph_deploy.new][DEBUG ] Monitor ceph01 at 192.168.161.11
[ceph_deploy.new][DEBUG ] Monitor initial members are ['ceph01']
[ceph_deploy.new][DEBUG ] Monitor addrs are ['192.168.161.11']
[ceph_deploy.new][DEBUG ] Creating a random mon key...
[ceph_deploy.new][DEBUG ] Writing monitor keyring to ceph.mon.keyring...
[ceph_deploy.new][DEBUG ] Writing initial config to ceph.conf...
注解
会在当前配置文件目录生成以下配置文件
[root@ceph01 ceph]# ls
ceph.conf  ceph-deploy-ceph.log  ceph.mon.keyring
[root@ceph01 ceph]# ll
总用量 12
-rw-r--r-- 1 root root  198 12月 29 20:53 ceph.conf
-rw-r--r-- 1 root root 2933 12月 29 20:53 ceph-deploy-ceph.log
-rw------- 1 root root   73 12月 29 20:53 ceph.mon.keyring

说明:

ceph.conf               集群配置文件

ceph-deploy-ceph.log    使用ceph-deploy部署的日志记录

ceph.mon.keyring        mon的验证key文件 监控需要的令牌
2.2.3 集群节点安装ceph
ceph01 ceph02 ceph03同时安装
[root@ceph01 ~]# ceph-deploy install ceph01 ceph02 ceph03

此情况适用于可以连接到公网,且网络环境较好的情况下。有时间的话会补充一版在内网情况下使用rpm包安装ceph集群的方法

查看ceph版本
[root@ceph01 ceph]# ceph -v
ceph version 13.2.10 (564bdc4ae87418a232fc901524470e1a0f76d641) mimic (stable)

客户端client安装ceph-common 我这里是ceph01

[root@ceph01 ceph]# yum install -y ceph-common

创建mon监控

解决public网络用于监控

修改配置文件在[global]配置端添加下面一句

public network = 192.168.161.0/24

修改完毕对配置文件进行分发
[root@ceph01 ceph]# ceph-deploy --overwrite-conf config push ceph01 ceph02 ceph03

监控节点初始化,并同步配置到所有节点(node1,node2,node3,若client未复用的话则不包含client服务器)
[root@ceph01 ceph]# ceph-deploy mon create-initial

查看ceph健康状态
[root@ceph01 ceph]# ceph health
HEALTH_OK
或者
[root@ceph01 ceph]# ceph -s
  cluster:
    id:     81f4932c-654d-43a2-96a9-53fb54f4e5e2
    health: HEALTH_OK

  services:
    mon: 1 daemons, quorum ceph01
    mgr: no daemons active
    osd: 0 osds: 0 up, 0 in

  data:
    pools:   0 pools, 0 pgs
    objects: 0  objects, 0 B
    usage:   0 B used, 0 B / 0 B avail
    pgs:

将配置信息同步至其他所有节点
[root@ceph01 ceph]# ceph-deploy admin ceph01 ceph02 ceph03

在ceph02,ceph03 多了几个配置文件

[root@ceph03 ~]# ll /etc/ceph/
总用量 12
-rw------- 1 root root 151 12月 29 21:50 ceph.client.admin.keyring
-rw-r--r-- 1 root root 232 12月 29 21:50 ceph.conf
-rw-r--r-- 1 root root  92 4月  24 2020 rbdmap
-rw------- 1 root root   0 12月 29 21:42 tmpthTtJx

为了防止mon单点故障,你可以加多个mon节点(建议奇数个,因为有quorum仲裁投票)


[root@ceph01 ceph]# ceph-deploy mon add ceph02
[root@ceph01 ceph]# ceph-deploy mon add ceph03

再次查看ceph集群状态


[root@ceph01 ceph]# ceph -s
  cluster:
    id:     81f4932c-654d-43a2-96a9-53fb54f4e5e2
    health: HEALTH_OK

  services:
    mon: 3 daemons, quorum ceph01,ceph02,ceph03   mon数量已经由一个变为三个
    mgr: no daemons active
    osd: 0 osds: 0 up, 0 in

  data:
    pools:   0 pools, 0 pgs
    objects: 0  objects, 0 B
    usage:   0 B used, 0 B / 0 B avail
    pgs:
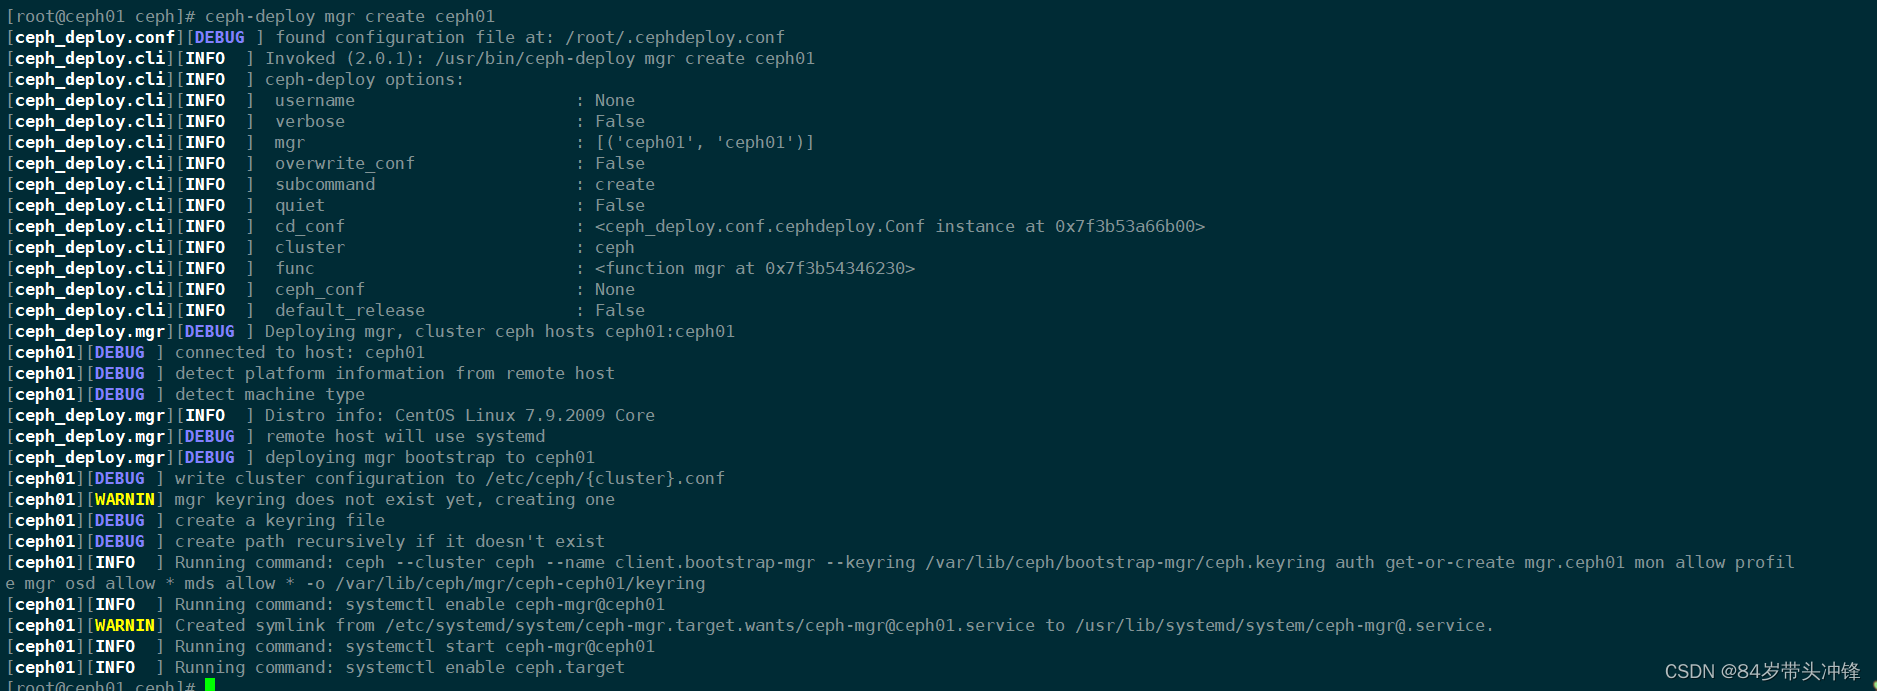
2.3 创建mgr(管理)
ceph luminous版本中新增加了一个组件:Ceph Manager Daemon,简称ceph-mgr
该组件的主要作用是分担和扩展monitor的部分功能,减轻monitor的负担,让更好地管理ceph存储系统。
[root@ceph01 ceph]# ceph-deploy mgr create ceph01
查看
[root@ceph01 ceph]# ceph -s
  cluster:
    id:     81f4932c-654d-43a2-96a9-53fb54f4e5e2
    health: HEALTH_WARN
            OSD count 0 < osd_pool_default_size 3

  services:
    mon: 3 daemons, quorum ceph01,ceph02,ceph03
    mgr: ceph01(active)     ##创建一个mgr节点是ceph01
    osd: 0 osds: 0 up, 0 in

  data:
    pools:   0 pools, 0 pgs
    objects: 0  objects, 0 B
    usage:   0 B used, 0 B / 0 B avail
    pgs:
添加多个mgr可以实现HA
[root@ceph01 ceph]# ceph-deploy mgr create ceph02 ceph03
[root@ceph01 ceph]# ceph -s
  cluster:
    id:     81f4932c-654d-43a2-96a9-53fb54f4e5e2
    health: HEALTH_WARN
            OSD count 0 < osd_pool_default_size 3

  services:
    mon: 3 daemons, quorum ceph01,ceph02,ceph03
    mgr: ceph01(active), standbys: ceph02, ceph03
    osd: 0 osds: 0 up, 0 in

  data:
    pools:   0 pools, 0 pgs
    objects: 0  objects, 0 B
    usage:   0 B used, 0 B / 0 B avail
    pgs:
2.4 创建OSD(存储盘)
查看命令帮助
[root@ceph01 ceph]# ceph-deploy osd --help
usage: ceph-deploy osd [-h] {list,create} ...
Create OSDs from a data disk on a remote host:
ceph-deploy osd create {node} --data /path/to/device
For bluestore, optional devices can be used::
ceph-deploy osd create {node} --data /path/to/data --block-db /path/to/db-device
ceph-deploy osd create {node} --data /path/to/data --block-wal /path/to/wal-device
ceph-deploy osd create {node} --data /path/to/data --block-db /path/to/db-device --block-wal /path/to/wal-device
For filestore, the journal must be specified, as well as the objectstore::
ceph-deploy osd create {node} --filestore --data /path/to/data --journal /path/to/journal
For data devices, it can be an existing logical volume in the format of:
vg/lv, or a device. For other OSD components like wal, db, and journal, it
can be logical volume (in vg/lv format) or it must be a GPT partition.
positional arguments:
{list,create}
list List OSD info from remote host(s)
create Create new Ceph OSD daemon by preparing and activating a
device
optional arguments:
-h, --help show this help message and exit
[root@ceph01 ceph]# ceph-deploy disk --help
usage: ceph-deploy disk [-h] {zap,list} ...
Manage disks on a remote host.
positional arguments:
{zap,list}
zap destroy existing data and filesystem on LV or partition
list List disk info from remote host(s)
optional arguments:
-h, --help show this help message and exit
查看本机磁盘 注:ceph创建osd时最好选择一块干净的硬盘,无需挂载
[root@ceph01 ceph]# lsblk
NAME MAJ:MIN RM SIZE RO TYPE MOUNTPOINT
sda 8:0 0 60G 0 disk
├─sda1 8:1 0 500M 0 part /boot
└─sda2 8:2 0 59.5G 0 part
├─centos-root 253:0 0 57.1G 0 lvm /
└─centos-swap 253:1 0 2.5G 0 lvm [SWAP]
sdb 8:16 0 40G 0 disk
sr0 11:0 1 4.3G 0 rom
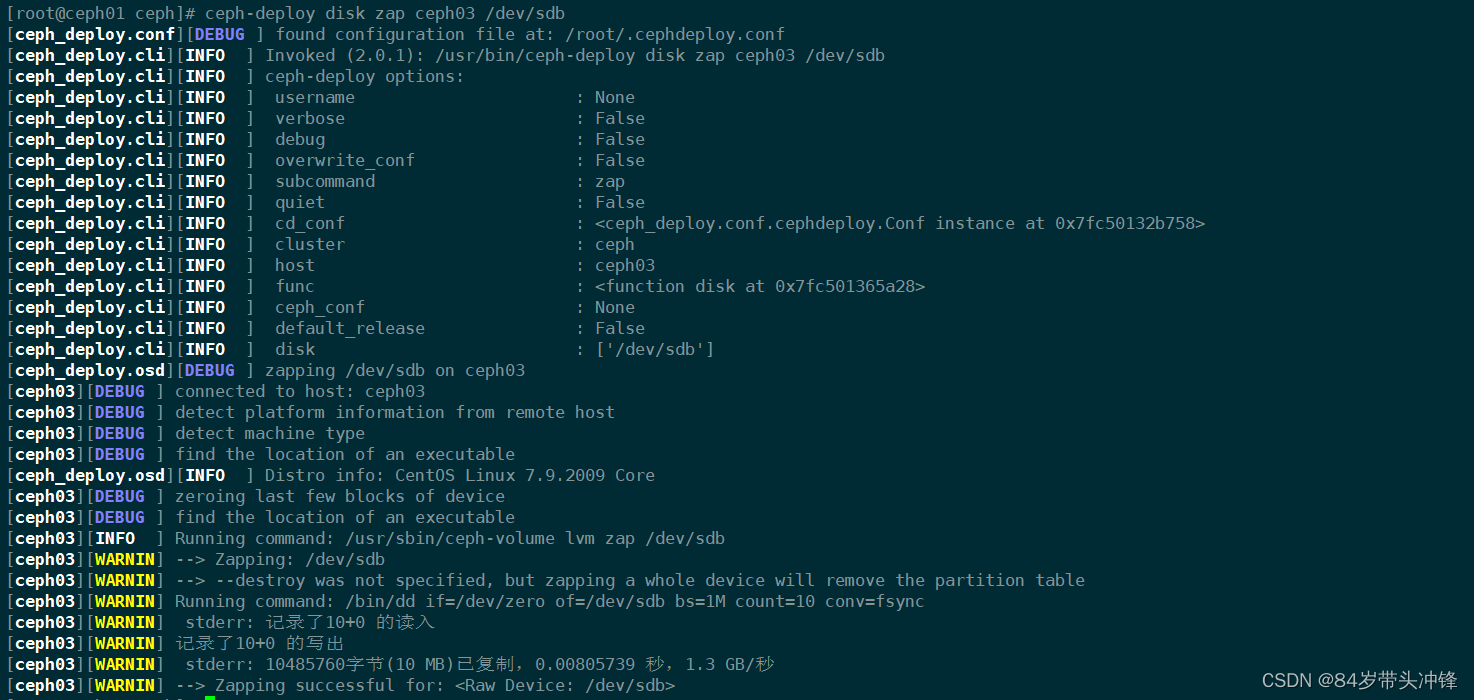
若是对磁盘不确定可以先用zap命令将磁盘格式化
注:zap表示干掉磁盘上的数据,相当于格式化
[root@ceph01 ceph]# ceph-deploy disk zap ceph02 /dev/sdb
[root@ceph01 ceph]# ceph-deploy disk zap ceph03 /dev/sdb
将磁盘创建为osd
[root@ceph01 ceph]# ceph-deploy  osd create --data /dev/sdb ceph01
[root@ceph01 ceph]# ceph-deploy  osd create --data /dev/sdb ceph02
[root@ceph01 ceph]# ceph-deploy  osd create --data /dev/sdb ceph03

查看osd集群状态

[root@ceph01 ceph]# ceph osd tree
ID CLASS WEIGHT  TYPE NAME       STATUS REWEIGHT PRI-AFF
-1       0.11728 root default
-3       0.03909     host ceph01
 0   hdd 0.03909         osd.0       up  1.00000 1.00000
-5       0.03909     host ceph02
 1   hdd 0.03909         osd.1       up  1.00000 1.00000
-7       0.03909     host ceph03
 2   hdd 0.03909         osd.2       up  1.00000 1.00000


查看ceph状态

[root@ceph01 ceph]# ceph -s
  cluster:
    id:     81f4932c-654d-43a2-96a9-53fb54f4e5e2
    health: HEALTH_OK

  services:
    mon: 3 daemons, quorum ceph01,ceph02,ceph03
    mgr: ceph01(active), standbys: ceph02, ceph03
    osd: 3 osds: 3 up, 3 in ##3个osd 3个up启用状态 3 in代表3G在使用 每块硬盘占用1G

  data:
    pools:   0 pools, 0 pgs
    objects: 0  objects, 0 B
    usage:   3.0 GiB used, 117 GiB / 120 GiB avail  #3G使用 117G空闲 总计120G及三块40G硬盘相加之和
    pgs:
集群节点的扩容方法
假设再加一个新的集群节点node4
1, 主机名配置和绑定
2, 在node4上`yum install ceph ceph-radosgw -y`安装软件
3, 在部署节点node1上同步配置文件给node4. `ceph-deploy admin node4`
4, 按需求选择在node4上添加mon或mgr或osd等
2.5 ceph dashboard
查看集群状态确认mgr的active节点
[root@ceph01 ceph]# ceph -s
  cluster:
    id:     81f4932c-654d-43a2-96a9-53fb54f4e5e2
    health: HEALTH_OK

  services:
    mon: 3 daemons, quorum ceph01,ceph02,ceph03
    mgr: ceph01(active), standbys: ceph02, ceph03
    osd: 3 osds: 3 up, 3 in

  data:
    pools:   0 pools, 0 pgs
    objects: 0  objects, 0 B
    usage:   3.0 GiB used, 117 GiB / 120 GiB avail
    pgs:
查看开启及关闭的模块
[root@ceph01 ceph]# ceph mgr module ls
{
    "enabled_modules": [
        "balancer",
        "crash",
        "iostat",
        "restful",
        "status"
    ],
    "disabled_modules": [
        {
            "name": "dashboard",
            "can_run": true,
            "error_string": ""
        },
        {
            "name": "hello",
            "can_run": true,
            "error_string": ""
        },
        {
            "name": "influx",
            "can_run": false,
            "error_string": "influxdb python module not found"
        },
        {
            "name": "localpool",
            "can_run": true,
            "error_string": ""
        },
        {
            "name": "prometheus",
            "can_run": true,
            "error_string": ""
        },
        {
            "name": "selftest",
            "can_run": true,
            "error_string": ""
        },
        {
            "name": "smart",
            "can_run": true,
            "error_string": ""
        },
        {
            "name": "telegraf",
            "can_run": true,
            "error_string": ""
        },
        {
            "name": "telemetry",
            "can_run": true,
            "error_string": ""
        },
        {
            "name": "zabbix",
            "can_run": true,
            "error_string": ""
        }
    ]
}
开启dashboard模块
[root@ceph01 ceph]# ceph mgr module enable dashboard

如果出现以下错误
[root@localhost ceph]# ceph mgr module enable dashboard

Error ENOENT: all mgr daemons do not support module 'dashboard', pass --force to force enablement
则需要在每个开启mgr的节点安装ceph-mgr-dashboard

yum install ceph-mgr-dashboard -y

注意:不能仅仅在active节点安装,需要在standby节点都安装
创建自签名证书
[root@ceph01 ceph]# ceph dashboard create-self-signed-cert
Self-signed certificate created
生成密钥对,并配置给ceph mgr
[root@ceph01 ceph]# mkdir /etc/mgr-dashboard
[root@ceph01 ceph]# cd /etc/mgr-dashboard/
[root@ceph01 mgr-dashboard]# openssl req -new -nodes -x509 -subj "/O=IT-ceph/CN=cn" -days 3650 -keyout dashboard.key -out dashboard.crt -extensions v3_ca
Generating a 2048 bit RSA private key
...+++
.......................................+++
writing new private key to 'dashboard.key'
-----
[root@ceph01 mgr-dashboard]# ls
dashboard.crt  dashboard.key
在ceph集群的active mgr节点上(我这里为ceph01)配置mgr services
root@ceph01 mgr-dashboard]# ceph config set mgr mgr/dashboard/server_addr 192.168.161.11
[root@ceph01 mgr-dashboard]# ceph config set mgr mgr/dashboard/server_port 8080
重启dashboard模块,并查看访问地址
注意:需要重启不重启查看的端口是默认的8443端口无法访问
重启就是先关disable再开启enable
[root@ceph01 mgr-dashboard]# ceph mgr module disable dashboard
[root@ceph01 mgr-dashboard]# ceph mgr module enable dashboard
查看mgr service
[root@ceph01 mgr-dashboard]# ceph mgr services
{
    "dashboard": "https://192.168.161.11:8080/"
}
设置访问web页面用户名和密码
ceph dashboard set-login-credentials 用户名 密码
ceph config set mgr mgr/dashboard/server_port 端口号
[root@ceph01 mgr-dashboard]# ceph dashboard set-login-credentials admin admin
Username and password updated
通过本机或其它主机访问 https://ip:8080

三、Ceph文件存储
要运行Ceph文件系统,你必须先装只是带一个mds的Ceph存储集群
Ceph.MDS:为Ceph文件存储类型存放元数据metadata(也就是说Ceph块存储和Ceph对象存储不使用MDS)
3.1 创建文件存储并使用
第1步 在node1部署节点上修改配置/etc/ceph/ceph.conf 增加配置
mon_allow_pool_delete = true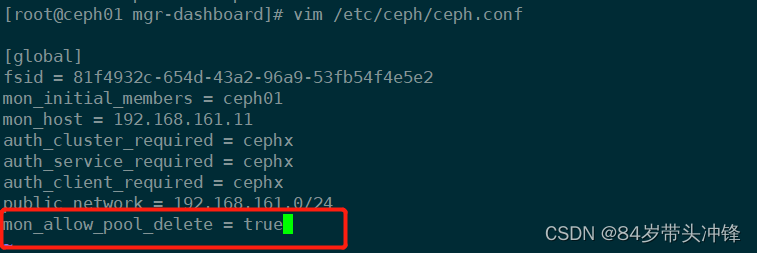
同步配置文件
注意:修改了配置文件才需要同步,没有修改不需要同步配置文件
注意命令执行位置
[root@ceph01 ceph]# pwd
/etc/ceph
[root@ceph01 ceph]# ceph-deploy --overwrite-conf admin ceph01 ceph02 ceph03
创建3个mds
[root@ceph01 ceph]# ceph-deploy mds create ceph01 ceph02 ceph03
第2步: 一个Ceph文件系统需要至少两个RADOS存储池,一个用于数据,一个用于元数据。所以我们创建它们
[root@ceph01 ceph]# ceph osd pool create cephfs_pool 128
pool 'cephfs_pool' created
[root@ceph01 ceph]# ceph osd pool create cephfs_metadata 64
pool 'cephfs_metadata' created
参数解释
创建pool自定义名为cephfs_pool 用于存储数据 PG数为128 用于存储数据所以PG数较大

创建pool自定义名为cephfs_metadata 用于存储元数据 PG数为64
3.2 PG介绍
PG, Placement Groups。CRUSH先将数据分解成一组对象,然后根据对象名称、复制级别和系统中的PG数等信息执行散列操作,再将结果生成PG ID。可以将PG看做一个逻辑容器,这个容器包含多个对象,同时这个逻辑对象映射之多个OSD上。
如果没有PG,在成千上万个OSD上管理和跟踪数百万计的对象的复制和传播是相当困难的。没有PG这一层,管理海量的对象所消耗的计算资源也是不可想象的。建议每个OSD上配置50~100个PG。
如过定义PG数
一般的:

少于5个OSD则PG数为128
5-10个OSD则PG数为512
10-50个OSD则PG数为1024
如果有更多的OSD需要自己理解计算
查看
[root@ceph01 ceph]# ceph osd pool ls |grep cephfs
cephfs_pool
cephfs_metadata
查看创建的pool详细信息
[root@ceph01 ceph]# ceph osd pool get cephfs_pool all
size: 3
min_size: 2
pg_num: 128
pgp_num: 128
crush_rule: replicated_rule
hashpspool: true
nodelete: false
nopgchange: false
nosizechange: false
write_fadvise_dontneed: false
noscrub: false
nodeep-scrub: false
use_gmt_hitset: 1
auid: 0
fast_read: 0
第3步: 创建Ceph文件系统,并确认客户端访问的节点
[root@ceph01 ceph]# ceph fs new cephfs cephfs_metadata cephfs_pool
new fs with metadata pool 2 and data pool 1
查看
[root@ceph01 ceph]# ceph fs new cephfs cephfs_metadata cephfs_pool
new fs with metadata pool 2 and data pool 1
[root@ceph01 ceph]# ceph osd pool ls
cephfs_pool
cephfs_metadata
[root@ceph01 ceph]# ceph fs ls
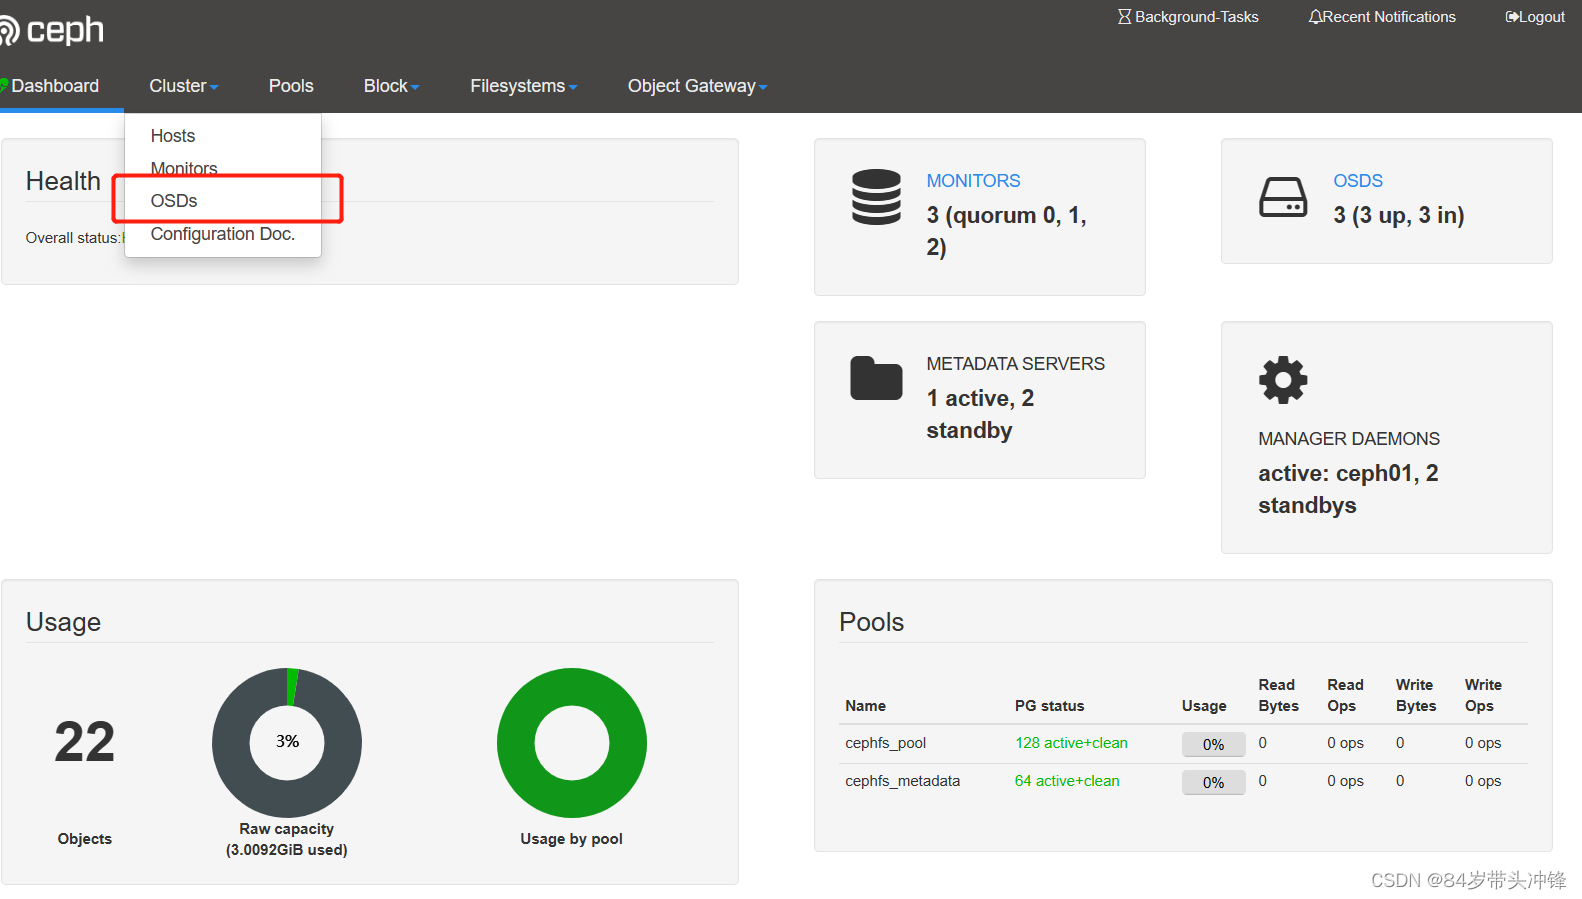
name: cephfs, metadata pool: cephfs_metadata, data pools: [cephfs_pool ]

[root@ceph01 ceph]# ceph mds stat
cephfs-1/1/1 up  {0=ceph03=up:active}, 2 up:standby  这里ceph03状态为up

metadata保存在node3上
客户端准备验证key文件
说明: ceph默认启用了cephx认证, 所以客户端的挂载必须要验证(ceph.conf默认配置文件开启)
在集群节点(ceph01,ceph02,ceph03)上任意一台查看密钥字符串
[root@ceph01 ceph]# cat /etc/ceph/ceph.client.admin.keyring
[client.admin]
key = AQBgmq1jmm5YCRAAKz2jLc1wFSFDL6/X68P1YA==
caps mds = "allow *"
caps mgr = "allow *"
caps mon = "allow *"
caps osd = "allow *"
输出
[root@ceph01 ceph]# ceph-authtool -p /etc/ceph/ceph.client.admin.keyring >admin.key
把这个文件放在客户端client /root/admin.key
注意:直接把key复制编辑admin.key文档可能会在挂载时报错
客户端client安装
[root@ceph01 ceph]# yum install -y ceph-fuse
已加载插件:fastestmirror, priorities
Loading mirror speeds from cached hostfile
需要安装否则客户端不支持
客户端挂载
可以使用其他node主机名进行挂载,例如ceph03
[root@ceph01 ceph]# mount -t ceph ceph03:6789:/ /mnt -o name=admin,secretfile=/root/admin.key
unable to read secretfile: No such file or directory
error reading secret file
failed to parse ceph_options
挂载失败
注意:如果使用文件挂载报错可以使用参数secret=秘钥进行挂载
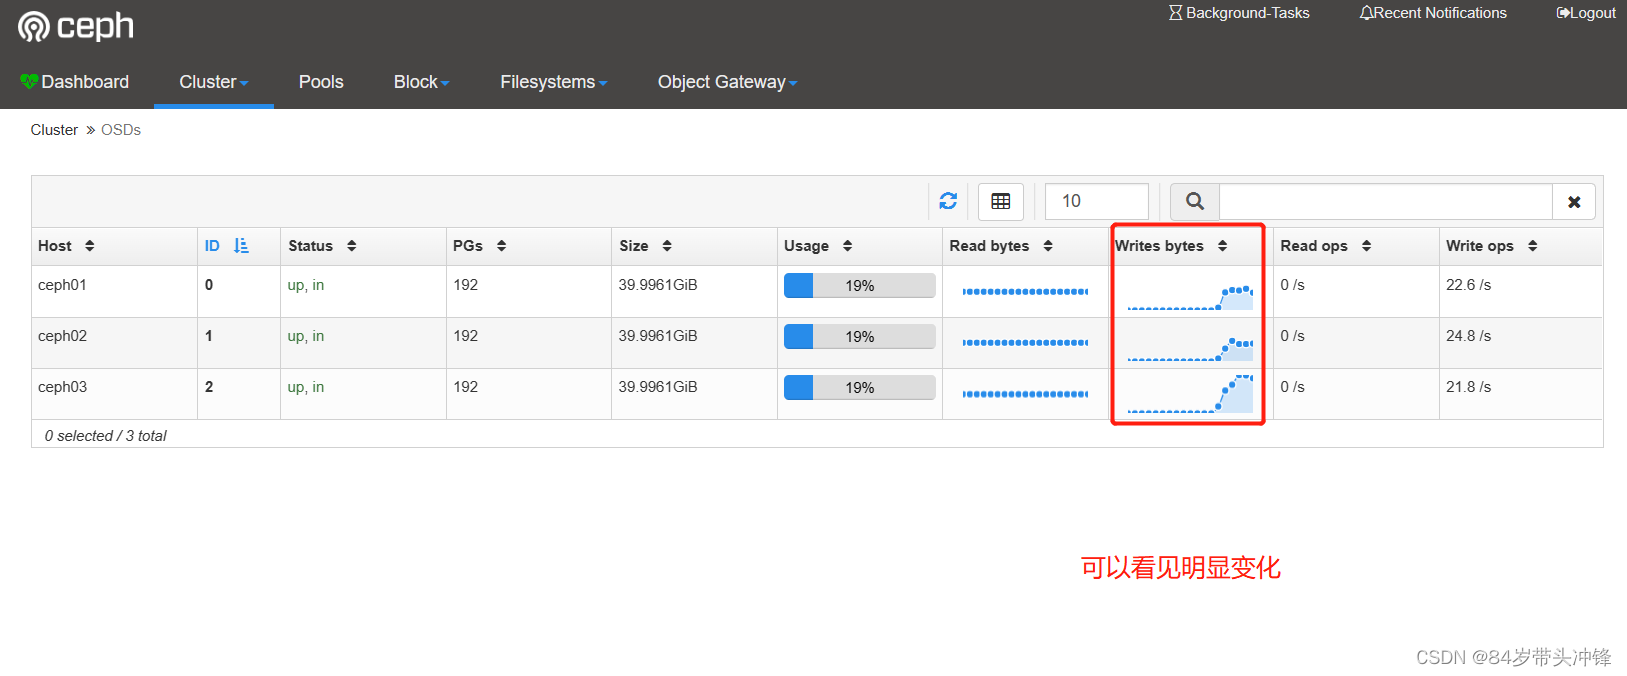
可以使用两个客户端, 同时挂载此文件存储,可实现同读同写
往挂载的硬盘写数据可以在dashboard查看读写监控状态
[root@ceph01 ceph]# df -h
文件系统 容量 已用 可用 已用% 挂载点
devtmpfs 1.9G 0 1.9G 0% /dev
tmpfs 1.9G 0 1.9G 0% /dev/shm
tmpfs 1.9G 12M 1.9G 1% /run
tmpfs 1.9G 0 1.9G 0% /sys/fs/cgroup
/dev/mapper/centos-root 58G 2.1G 56G 4% /
/dev/sda1 497M 170M 328M 35% /boot
tmpfs 378M 0 378M 0% /run/user/0
tmpfs 1.9G 52K 1.9G 1% /var/lib/ceph/osd/ceph-0
[root@ceph01 ~]# mount -t ceph ceph03:6789:/ /mnt -o name=admin,secretfile=/root/admin.key
unable to read secretfile: No such file or directory
error reading secret file
failed to parse ceph_options
[root@ceph01 ~]# mount -t ceph ceph03:6789:/ /mnt -o name=admin,secret=AQBgmq1jmm5YCRAAKz2jLc1wFSFDL6/X68P1YA==
挂载成功
[root@ceph01 ~]# df -h
文件系统 容量 已用 可用 已用% 挂载点
devtmpfs 1.9G 0 1.9G 0% /dev
tmpfs 1.9G 0 1.9G 0% /dev/shm
tmpfs 1.9G 12M 1.9G 1% /run
tmpfs 1.9G 0 1.9G 0% /sys/fs/cgroup
/dev/mapper/centos-root 58G 2.1G 56G 4% /
/dev/sda1 497M 170M 328M 35% /boot
tmpfs 378M 0 378M 0% /run/user/0
tmpfs 1.9G 52K 1.9G 1% /var/lib/ceph/osd/ceph-0
192.168.161.13:6789:/ 37G 0 37G 0% /mnt
使用dd命令进行测试
[root@ceph01 ~]# dd if=/dev/zero of=/mnt/file1 bs=10M count=1000
记录了1000+0 的读入
记录了1000+0 的写出
10485760000字节(10 GB)已复制,35.3733 秒,296 MB/秒
3.3 删除文件存储
在所有挂载了文件存储的客户端卸载文件挂载
在所有挂载了文件存储的客户端卸载文件挂载
umount /mnt

停掉所有节点的mds ceph01 ceph02 ceph03

systemctl stop ceph-mds.target

回到集群任意一个节点上(ceph01,ceph02,ceph03其中之一)删除

如果要客户端删除,需要在ceph01上`ceph-deploy admin client`同步配置才可以

[root@ceph01 ~]# ceph fs rm cephfs --yes-i-really-mean-it

[root@ceph01 ~]# ceph osd pool delete cephfs_metadata cephfs_metadata --yes-i-really-really-mean-it

pool 'cephfs_metadata' removed

[root@ceph01 ~]# ceph osd pool delete cephfs_pool cephfs_pool --yes-i-really-really-mean-it

pool 'cephfs_pool' removed


注意:为了安全需要输入两次创建的pool名并且加参数--yes-i-really-really-mean-it才能删除

注意:需要在配置文件添加以下配置,才能删除

mon_allow_pool_delete = true

如果已经添加配置还提示

Error EPERM: pool deletion is disabled; you must first set the mon_allow_pool_delete config option to true before you can destroy a pool


则重启服务ceph-mon.target即可

启动md是服务  ceph01,ceph02,ceph03 节点启动

systemctl start ceph-mds.target
四、Ceph快存储
第一步:在ceph01上同步配置文件到client
[root@ceph01 ~]# cd /etc/ceph/
[root@ceph01 ceph]# ceph-deploy admin client
第二步:建立存储池,并初始化
在客户端client操作
[root@ceph01 ceph]# ceph osd pool create rbd_pool 128
pool 'rbd_pool' created
初始化
[root@ceph01 ceph]# rbd pool init rbd_pool
第三步:创建一个存储卷(这里卷名为vokume1 大小为5000M)
[root@ceph01 ~]# rbd create vokume1 --pool rbd_pool --size 5000

查看

[root@ceph01 ~]# rbd ls rbd_pool
vokume1

[root@ceph01 ceph]# rbd info vokume1 -p rbd_pool
rbd image 'vokume1':
	size 4.9 GiB in 1250 objects
	order 22 (4 MiB objects)
	id: 85536b8b4567
	block_name_prefix: rbd_data.85536b8b4567
	format: 2
	features: layering, exclusive-lock, object-map, fast-diff, deep-flatten
	op_features:
	flags:
	create_timestamp: Fri Dec 30 22:22:19 2022
第四步:将创建的卷映射成块设备
因为rbd镜像的一些特性,OS kernel并不支持,所以映射报错
[root@ceph01 ~]# rbd map rbd_pool/volume1

rbd: sysfs write failed

RBD image feature set mismatch. You can disable features unsupported by the kernel with "rbd feature disable rbd_pool/volume1 object-map fast-diff deep-flatten".

In some cases useful info is found in syslog - try "dmesg | tail".

rbd: map failed: (6) No such device or address
解决办法:disable掉相关特性
rbd feature disable rbd_pool/volume1 exclusive-lockobject-map fast-diff deep-flatten
再次映射
[root@ceph01 ~]# rbd map rbd_pool/vokume1

/dev/rbd0
创建了磁盘/dev/rbd0 类似于做了一个软连接
查看映射
[root@client ~]# rbd showmapped

id pool     image   snap device

0  rbd_pool volume1 -    /dev/rbd0
如果需要取消映射可以使用命令
rbd unmap /dev/rbd0第六步:格式化挂载
mkfs.xfs /dev/rbd0

mount /dev/rbd0 /mnt
查看
[root@client ~]# df -h|tail -1

/dev/rbd0                4.9G   33M  4.9G    1% /mnt
块扩容与裁减
扩容成8000M
[root@client ~]# rbd resize --size 8000 rbd_pool/volume1

Resizing image: 100% complete...done.
查看并没有变化
[root@client ~]# df -h|tail -1

/dev/rbd0                4.9G   33M  4.9G    1% /mnt
动态刷新扩容
[root@client ~]# xfs_growfs -d /mnt/

meta-data=/dev/rbd0              isize=512    agcount=8, agsize=160768 blks

         =                       sectsz=512   attr=2, projid32bit=1

         =                       crc=1        finobt=0 spinodes=0

data     =                       bsize=4096   blocks=1280000, imaxpct=25

         =                       sunit=1024   swidth=1024 blks

naming   =version 2              bsize=4096   ascii-ci=0 ftype=1

log      =internal               bsize=4096   blocks=2560, version=2

         =                       sectsz=512   sunit=8 blks, lazy-count=1

realtime =none                   extsz=4096   blocks=0, rtextents=0

data blocks changed from 1280000 to 2048000
注意:该命令和LVM扩容命令一致
再次查看,扩容成功
[root@client ~]# df -h|tail -1

/dev/rbd0                7.9G   33M  7.8G    1% /mnt
块存储裁减
不能在线裁减,裁减后需要重新格式化再挂载,如果有数据需要提前备份好数据
裁减为5000M
[root@client ~]# rbd resize --size 5000 rbd_pool/volume1 --allow-shrink

Resizing image: 100% complete...done.
卸载,格式化
umount /mnt

fdisk -l

mkfs.xfs -f /dev/rbd0

mount /dev/rbd0 /mnt/
查看
[root@client ~]# df -h|tail -1

/dev/rbd0                4.9G   33M  4.9G    1% /mnt
删除块存储
#卸载

[root@client ~]# umount /mnt

#取消映射

[root@client ~]# rbd unmap /dev/rbd0

#删除存储池

[root@client ~]# ceph osd pool delete rbd_pool rbd_pool --yes-i-really-really-mean-it

pool 'rbd_pool' removed
五、ceph对象存储
第一步:在node1上创建rgw
[root@node1 ceph]# ceph-deploy rgw create node1
查看,运行端口是7480
lsof -i:7480第二步:在客户端测试连接对象网关
在client操作
安装测试工具
创建一个测试用户,需要在部署节点使用ceph-deploy admin client同步配置文件给client
[root@client ~]# radosgw-admin user create --uid="testuser" --display-name="First User"|grep -E 'access_key|secret_key'

            "access_key": "S859J38AS6WW1CZSB90M",

            "secret_key": "PCmfHoAsHw2GIEioSWvN887o02VXesOkX2gJ20fG"

[root@client ~]# radosgw-admin user create --uid="testuser" --display-name="First User"

{

    "user_id": "testuser",

    "display_name": "First User",

    "email": "",

    "suspended": 0,

    "max_buckets": 1000,

    "auid": 0,

    "subusers": [],

    "keys": [

        {

            "user": "testuser",

            "access_key": "S859J38AS6WW1CZSB90M",

            "secret_key": "PCmfHoAsHw2GIEioSWvN887o02VXesOkX2gJ20fG"

        }

    ],

    "swift_keys": [],

    "caps": [],

    "op_mask": "read, write, delete",

    "default_placement": "",

    "placement_tags": [],

    "bucket_quota": {

        "enabled": false,

        "check_on_raw": false,

        "max_size": -1,

        "max_size_kb": 0,

        "max_objects": -1

    },

    "user_quota": {

        "enabled": false,

        "check_on_raw": false,

        "max_size": -1,

        "max_size_kb": 0,

        "max_objects": -1

    },

    "temp_url_keys": [],

    "type": "rgw",

    "mfa_ids": []

}
上面一大段主要有用的为access_key与secret_key,用于连接对象存储网关
[root@client ~]# radosgw-admin user create --uid="testuser" --display-name="First User"|grep -E 'access_key|secret_key'

            "access_key": "S859J38AS6WW1CZSB90M",

            "secret_key": "PCmfHoAsHw2GIEioSWvN887o02VXesOkX2gJ20fG"
s3连接对象网关
第一步:客户端安装s3cmd工具,并编写配置文件
yum install s3cmd创建配置文件,内容如下
[root@client ~]# cat /root/.s3cfg

[default]

access_key = S859J38AS6WW1CZSB90M

secret_key = PCmfHoAsHw2GIEioSWvN887o02VXesOkX2gJ20fG

host_base = 192.168.161.11:7480

host_bucket = 192.168.161.11:7480/%(bucket)

cloudfront_host = 192.168.161.11:7480

use_https = False
列出bucket
列出bucket

s3cmd ls
创建一个桶
s3cmd mb s3://test_bucket
上传文件到桶
[root@client ~]# s3cmd put /etc/fstab s3://test_bucket
下载文件到当前目录
[root@client ~]# s3cmd get  s3://test_bucket/fstab